Getting Started with the Jetson Xavier NX Starter Kit

Just received your Jetson Xavier NX Kit? Or just want to find out more about the kit? You are at the right place! The Jetson Xavier NX Starter Kit contains all that you need to get started with running computer vision and machine learning algorithms on the Jetson NX. In this tutorial we will go through how to set up your Jetson Xavier NX. Let's get started! 🚀
Items Required
Included in the Jetson Xavier NX Starter Kit
- NVIDIA Jetson Xavier NX Developer Kit
- Jetson NX Acrylic case with Antennas
- 8MP Raspberry Pi Camera V2
- Acrylic Camera Case
- 32GB A1 microSD Card
Other required items for setup
- Display screen with HDMI input port
- USB Keyboard
- USB Mouse
Setup Guide
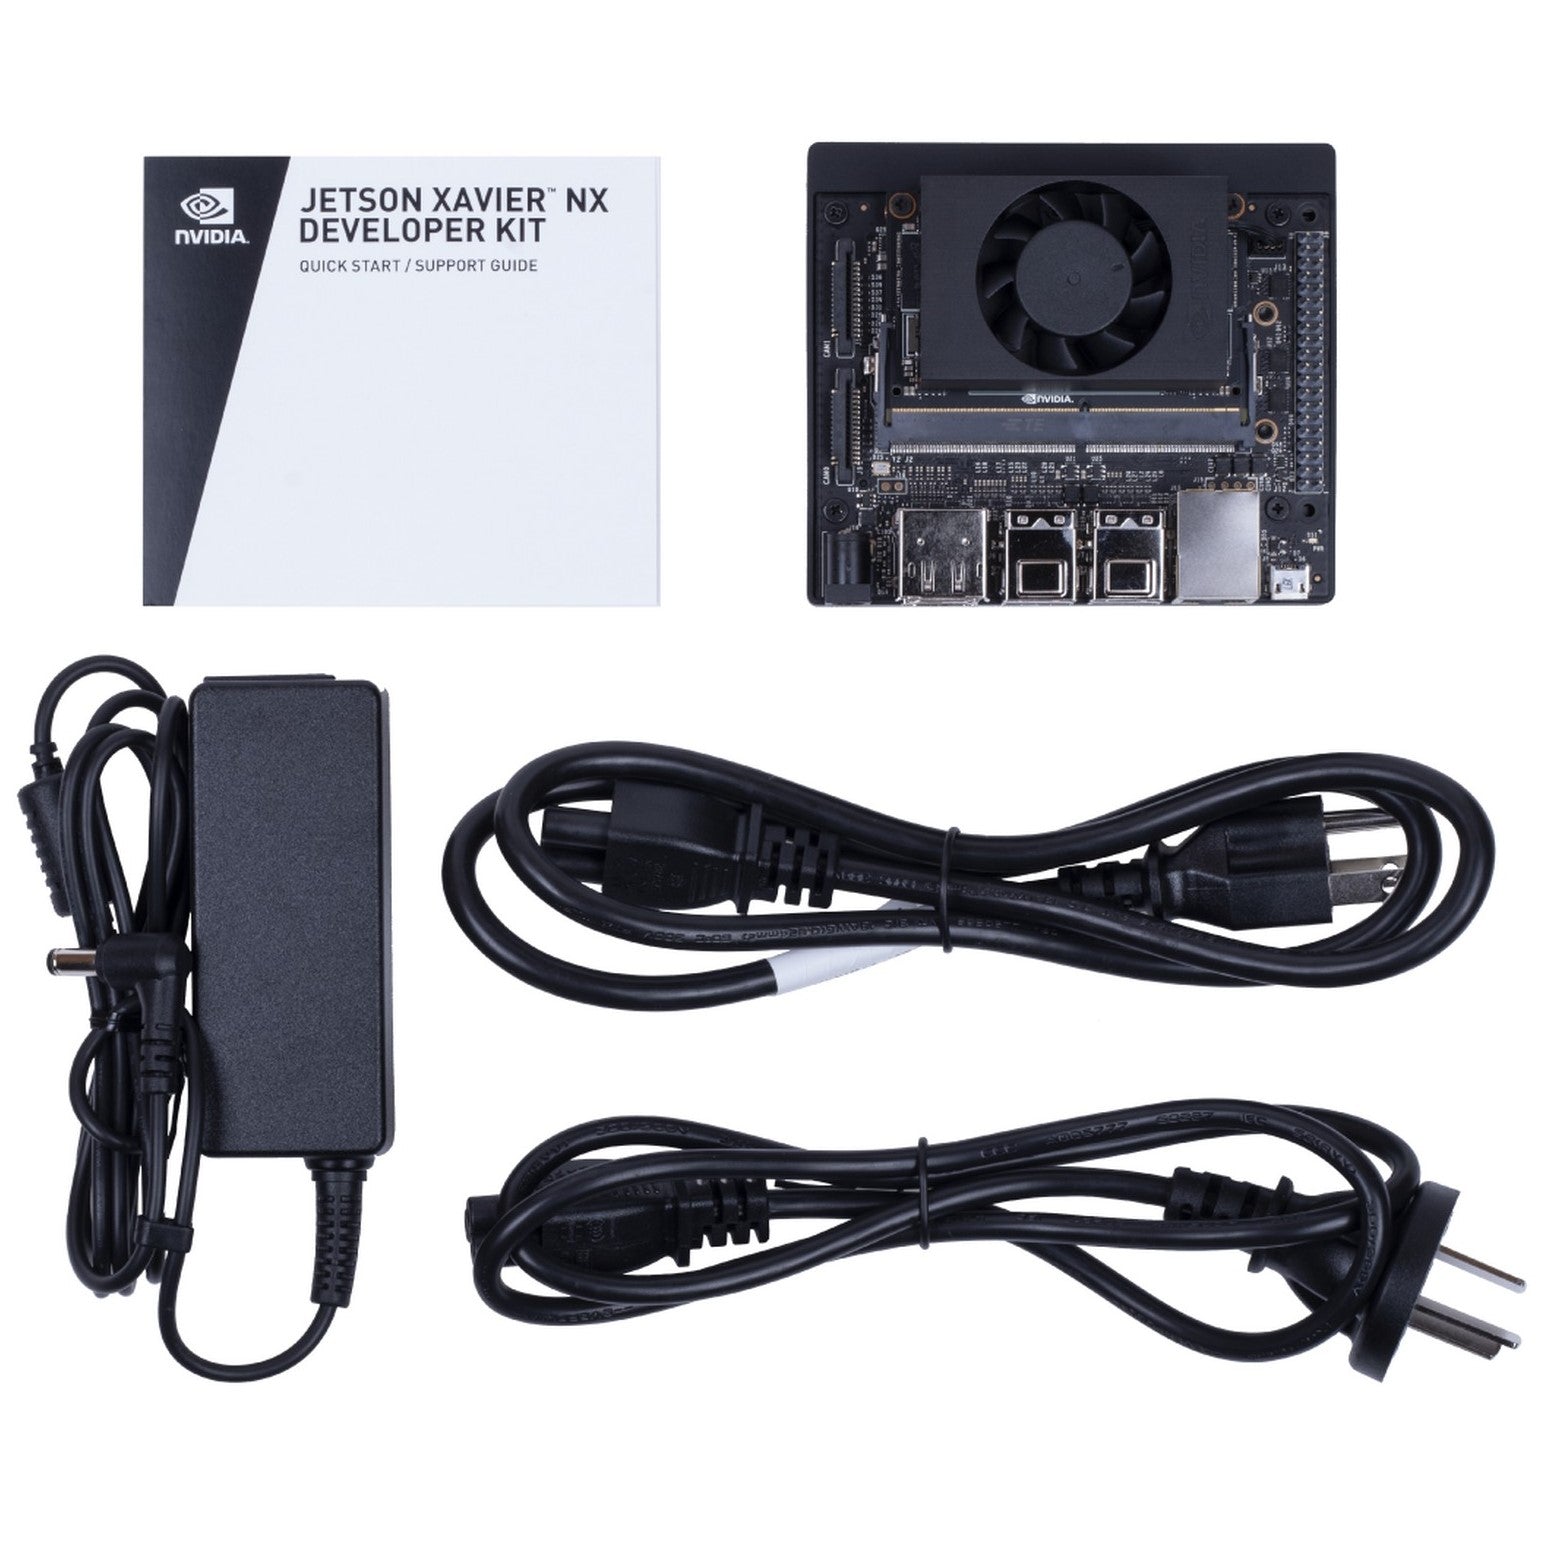
Step 1: Unbox the NVIDIA Jetson Xavier NX Developer Kit 📦
Open up the NVIDIA Xavier NX packaging box and you should find the following:
1) NVIDIA Jetson Xavier NX Developer Kit
2) 19V Power Brick
3) Wall Plug Power Cord

Step 2: Build the Acrylic Jetson NX Casing 🛠️
Follow the video below to build the acrylic case for the Jetson NX.
Note: Ensure that the antenna cables are properly connected to the wireless module by giving it a light tug before carrying on with building the rest of the case.
Step 3: Build the Acrylic Camera Case 📷
Follow the video below to build the acrylic case to hold the Raspberry Pi Camera module
Step 4: Connect and mount the camera to the Jetson NX 🎥
Insert the CSI cable from the camera into the port on the Jetson NX labelled CAM0. Take note of the orientation of the CSI cable, the metal contacts should be facing inwards.

Mount the camera case to the Jetson NX case using the plastic rivets provided.

Step 5: Download the Jetson NX SD Image and flash onto a microSD card 🔽
Head on over to the official NVIDIA Jetson Xavier NX Developer Kit starter page to download the latest SD Image for the Jetson NX. Follow instructions on the same page on how to flash the image onto the provided microSD card using balena Etcher.

Step 6: Boot up! ⚡
Insert the microSD card into the back of the Jetson Xavier NX Developer Kit.

Connect the Jetson NX to a monitor screen, keyboard and mouse via the HDMI and USB ports.
Connect the barrel jack to the Jetson NX, power cord to the power brick and the other end to a wall socket. (Use the provided wall plug adapter if required).Turn on the wall socket power and the Jetson NX should spring to life!
Step 7: Desktop Set-up and Camera Test⚙️
Follow on-screen instructions to set up the operating system and to connect to a WiFi network.

Once all the setup is done, its time to check that the installed camera is working well.
To do so, open up a terminal window (Keyboard shortcut: Ctrl-Alt-T) and run the following command:
$ gst-launch-1.0 nvarguscamerasrc ! 'video/x-raw(memory:NVMM),width=3820, height=2464, framerate=21/1, format=NV12' ! nvvidconv flip-method=2 ! 'video/x-raw,width=960, height=616' ! nvvidconv ! nvegltransform ! nveglglessink -e
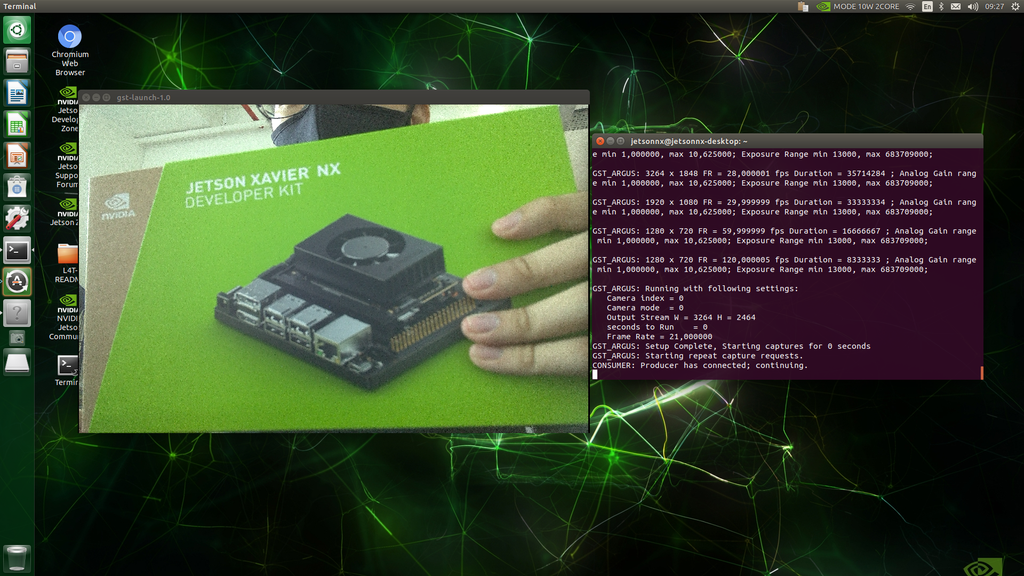
If you see a window showing the live feed from the camera then all is good! If not, check to make sure that the camera CSI cable is oriented correctly as in Step 4.
Explore and Create! 💡

The next step is to get started training and running your own neural networks on the Jetson Xavier NX Developer Kit! If you are new to AI on the Jetson platform, the Getting Started with Jetson AI course by NVIDIA is a good starting point!
Now, go forth and create! Here's a video about NVIDIA Cloud Support where the capabilities of the Jetson NX is demonstrated for your inspiration!